 An KangMin
한글시계
참고 자료
https://kocoafab.cc/make/view/508
https://hangulclock.today/#/main
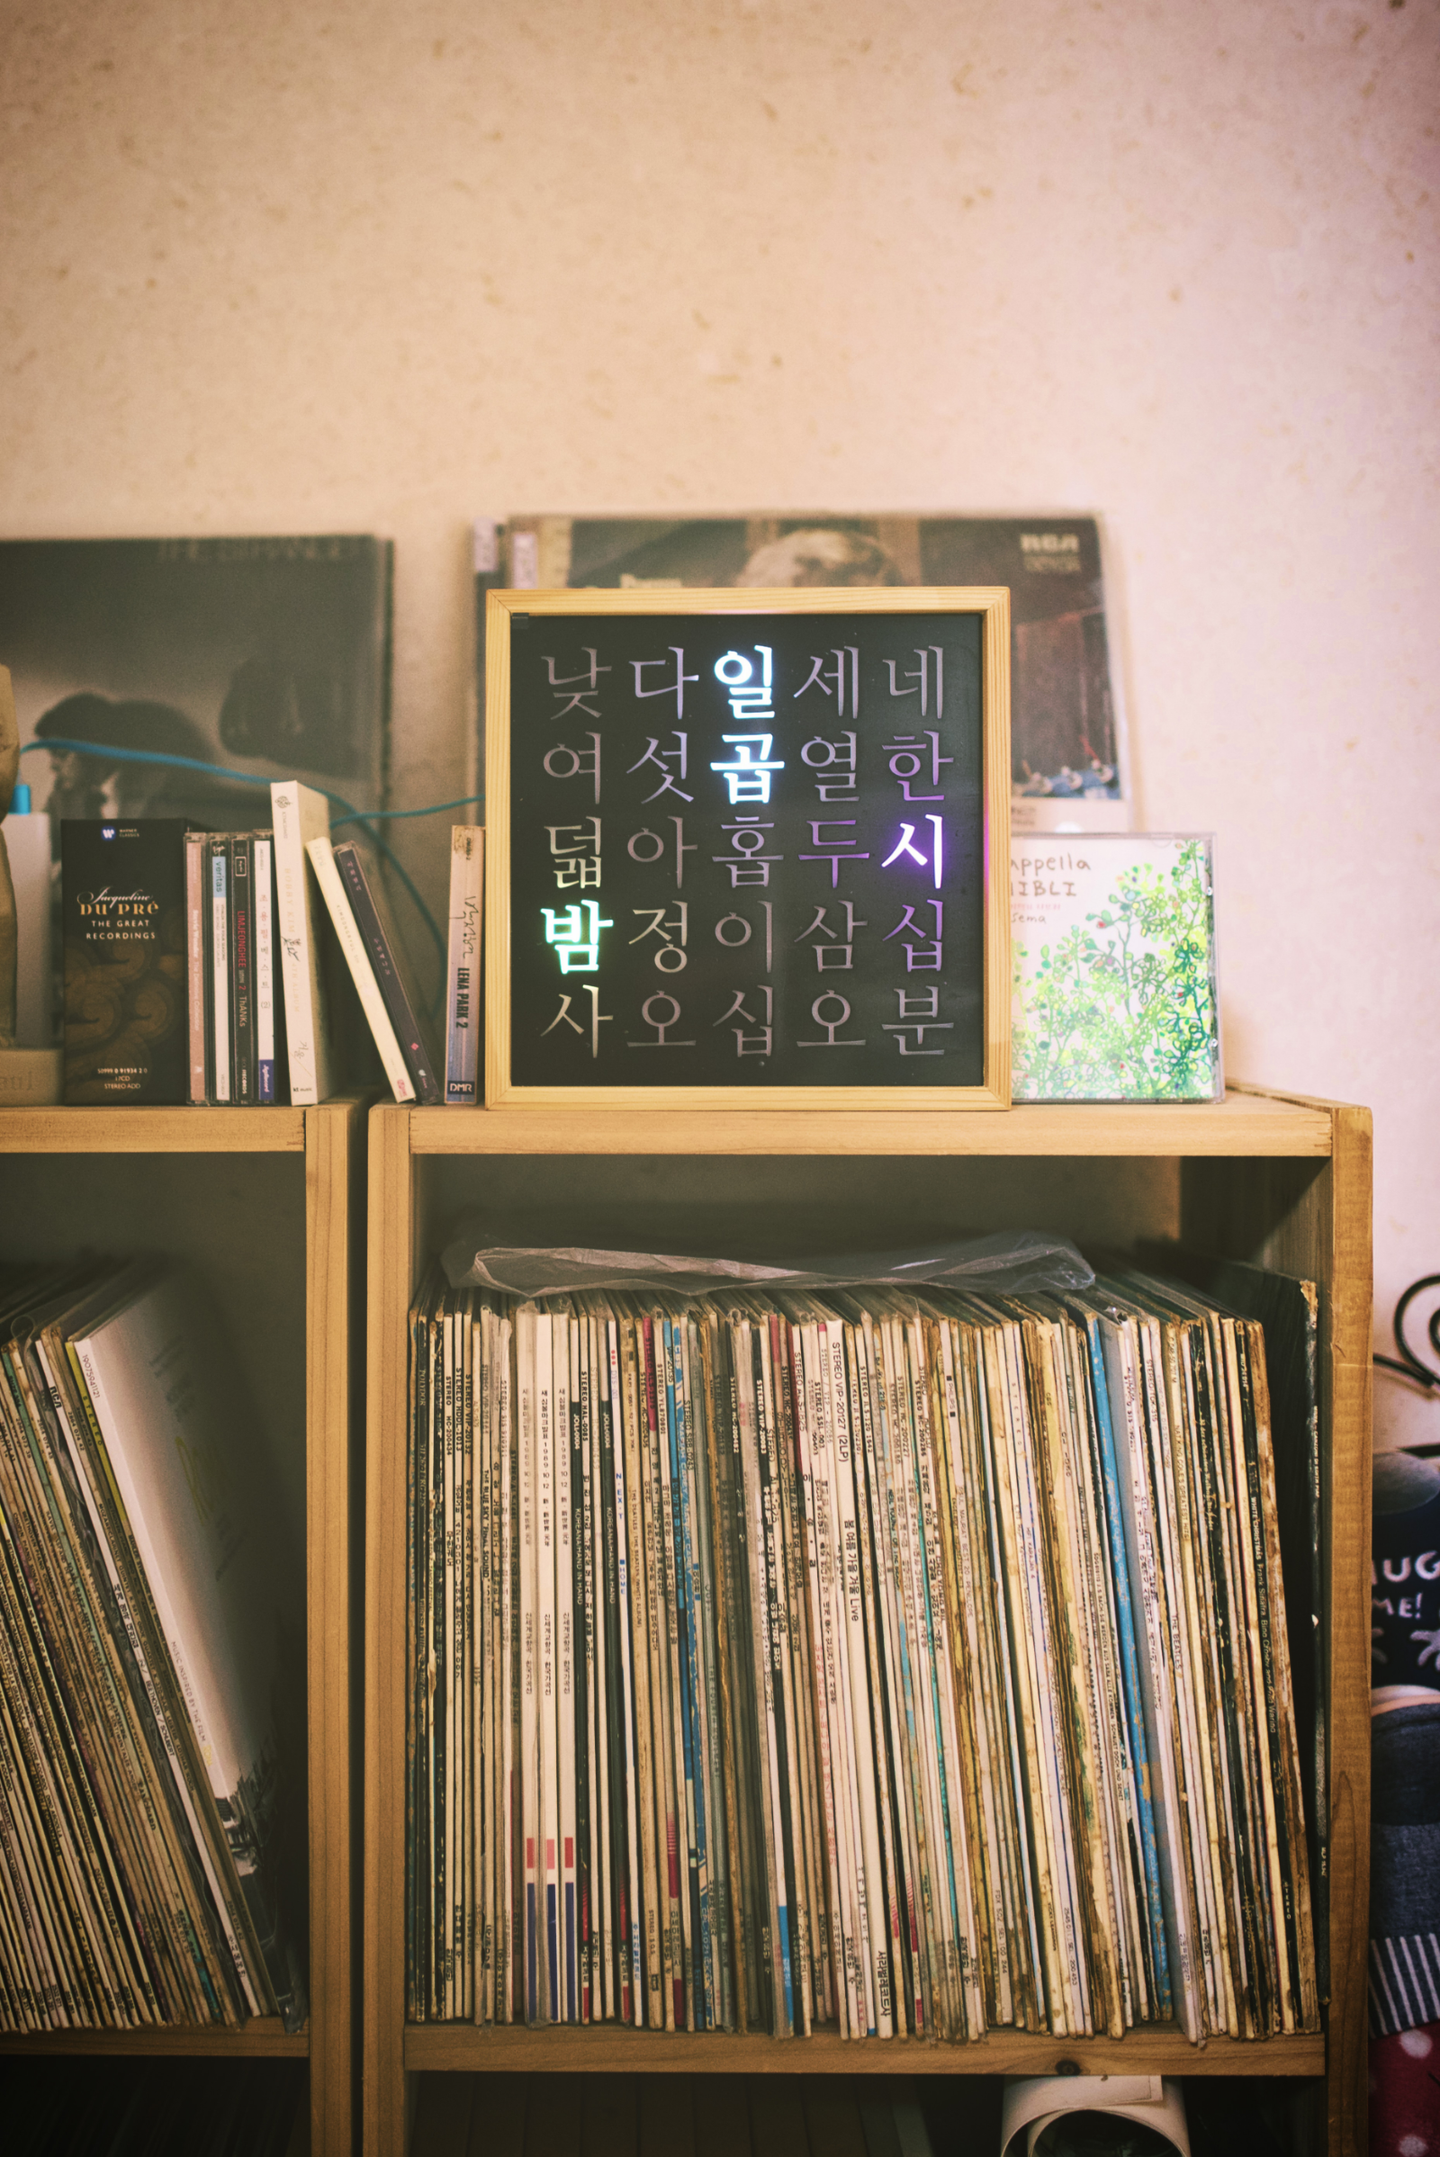
제작 목표 Model
현재 idus 라고 하는 곳에서 판매되는 제품을 목표로 하여 만들어보고자 합니다.
필요한 물품
1.RTC 모듈
: 전원이 유지 되면 RTC 모듈에 설정된 시각에서 시작하여 계속 시간이 흐르고 있는 부품 입니다.
: 시각을 표시할 LED로 사용합니다.
: RTC 모듈 및 LED 컨트롤러 역할을 하기위해서 사용합니다.
정품 아두이노 대신 가지고 있는 코딩어레이의 아두이노 우노 호환 보드를 사용할 예정입니다.
4.폼 보드
: 시계의 외형을 만들 때 사용합니다.
5.유산지 혹은 한지
: LED의 빛을 분산시켜 주기 위해 사용합니다.
한글 시계 화면
00 | 한 두 세 네 다 섯 | 5
11 | 여 섯 일 곱 여 덟 | 6
12 | 아 홉 열 한 두 시 | 17
23 | 오 이 삼 사 오 십 | 18
24 | 전 일 이 삼 사 오 | 29
35 | 후 육 칠 팔 구 분 | 30
한글은 시간을 표현할 부분이며, 숫자는 바로 옆의 글자의 NeoPixel Index를 나타내고 있습니다.
소스코드
// RTC 모듈으로 부터 시간을 가져오기 위한 라이브러리
#include <TimeLib.h>
#include <DS1302RTC.h>

// NeoPixel을 사용하기 위한 라이브러리
#include <Adafruit_NeoPixel.h>

const int CLK_PIN = 2;                                                // RTC 모둘의 CLK Pin 번호 설정
const int DAT_PIN = 3;                                                // RTC 모둘의 DAT Pin 번호 설정
const int RST_PIN = 4;                                                // RTC 모둘의 RST Pin 번호 설정

const int LED_PIN = 6;                                                // NeoPixel 모둘의 Digital IN Pin 번호 설정
const int LED_COUNT = 36;                                             // 사용하는 Pixel의 개수

// RTC 모듈에 대한 객체 생성
DS1302RTC rtc(RST_PIN, DAT_PIN, CLK_PIN);

// NeoPixel 모듈에 대한 객체 생성
Adafruit_NeoPixel strip(LED_COUNT, LED_PIN, NEO_GRB + NEO_KHZ800);

const uint32_t DAY_COLOR = strip.Color(255,150,0);                    // 낮 시간 (07~19) 동안 사용할 LED의 색 지정
const uint32_t NIGHT_COLOR = strip.Color(60,65,200);                  // 밤 시간 (19~07) 동안 사용할 LED의 색 지정
const uint32_t OH_COLOR = strip.Color(170,120,255);                   // "오전", "오후"를 표현할 색을 선언 합니다.

uint32_t nowColor;                                                    // 현재의 사계의 LED 색을 저장하는 변수

void setup() {
  // Serial 통신 시작
  Serial.begin(9600);
  Serial.println("RTC Module Time Read Start.");

  // RTC 모듈의 상태확인
  // RTC 모듈이 작동 중인지 확인
  if(rtc.haltRTC()){
    Serial.println("The DS1302 is stopped.");
    rtc.haltRTC(0);
    Serial.println("The DS1302 starts.");
    delay(100);
  } else{
    Serial.println("The DS1302 is working");
  }

  // RTC 모듈이 쓰기 가능 상태인지 확인
  if(rtc.writeEN() == 0){
    Serial.println("The DS1302 is write protected.");
  } else {
    Serial.println("The DS1302 can write");
    rtc.writeEN(false);
    Serial.println("Write protected is start");
  }

  // NeoPixel Strip이 빛을 출력하도록 설정
  strip.begin();                                                     // strip 초기화
  strip.show();                                                      // 설정된 값을 바탕으로 strip 출력
  strip.setBrightness(100);

  strip.setPixelColor(0,DAY_COLOR);
  strip.setPixelColor(1,NIGHT_COLOR);

  strip.show();
}

void loop() {
  tmElements_t tm;

  // timeElements_t를 이용해서 시간 데이터를 받아 저장합니다.
  if(rtc.read(tm) == 0){
    Serial.print(tmYearToCalendar(tm.Year));
    Serial.print(" / ");
    Serial.print(tm.Month);
    Serial.print(" / ");
    Serial.print(tm.Day);
    Serial.print(" - ");
    Serial.print(tm.Hour);
    Serial.print(" : ");
    Serial.print(tm.Minute);
    Serial.print(" : ");
    Serial.println(tm.Second);
  }

  strip.clear();                                      // 이전의 LED의 상태를 초기화 시킵니다.

  // 시계 내부의 LED의 색을 지정하는 부분입니다.
  checkTheme(tm.Hour);
  alwaysOn(tm.Hour);
  hourLightSet(tm.Hour);
  minuteLightSet(tm.Minute);

  strip.show();                                       // 시계의 LED에 빛이 들어오게 합니다.

  delay(30000);                                       // 30초마다 시간을 확인합니다.
}

// 현재 시간이 낮인지, 밤인지 확인하여 시계의 테마 색상을 정합니다.
void checkTheme(uint8_t h){
  if(7<= h && h <19){
    nowColor = DAY_COLOR;
  } else {
    nowColor = NIGHT_COLOR;
  }
}

// 항상 켜져있을 글자들 '시'와 '분' 그리고 '오전/후'의 색을 지정합니다.
void alwaysOn(uint8_t h){

  strip.setPixelColor(17,nowColor);                   // '시'의 색을 지정합니다.
  strip.setPixelColor(30,nowColor);                   // '분'의 색을 지정합니다.

  strip.setPixelColor(23,OH_COLOR);                   // '오'의 색을 지정합니다.
  if(0<= h && h <12){
    strip.setPixelColor(24,OH_COLOR);                 // '전'의 색을 지정합니다.
  } else {
    strip.setPixelColor(35,OH_COLOR);                 // '후'의 색을 지정합니다.
  }
}

// 현재 시간에 맞는 LED의 색을 지정합니다.
void hourLightSet(uint8_t h){
  switch(h%12){                                       // 오전과 오후가 나뉘어 있으므로 시간을 12로 나누어 나머지에 대해 색을 지정합니다.
    case 0:
      strip.setPixelColor(14,nowColor);
      strip.setPixelColor(16,nowColor);
      break;

    case 1:
      strip.setPixelColor(0,nowColor);
      break;

    case 2:
      strip.setPixelColor(1,nowColor);
      break;

    case 3:
      strip.setPixelColor(2,nowColor);
      break;

    case 4:
      strip.setPixelColor(3,nowColor);
      break;

    case 5:
      strip.setPixelColor(4,nowColor);
      strip.setPixelColor(5,nowColor);
      break;

    case 6:
      strip.setPixelColor(11,nowColor);
      strip.setPixelColor(10,nowColor);
      break;

    case 7:
      strip.setPixelColor(9,nowColor);
      strip.setPixelColor(8,nowColor);
      break;

    case 8:
      strip.setPixelColor(7,nowColor);
      strip.setPixelColor(6,nowColor);
      break;

    case 9:
      strip.setPixelColor(12,nowColor);
      strip.setPixelColor(13,nowColor);
      break;

    case 10:
      strip.setPixelColor(14,nowColor);
      break;

    case 11:
      strip.setPixelColor(14,nowColor);
      strip.setPixelColor(15,nowColor);
      break;
  }
}

// 현재 분에 맞는 LED의 색을 지정합니다.
void minuteLightSet(uint8_t m){
  if(m>=10){                                           // 10분이상이면 if문 내의 문장을 실행합니다.
    switch(m/10){                                      // 분의 십단위를 판별하여 색을 지정합니다.
      case 1:
        strip.setPixelColor(18,nowColor);
        break;

      case 2:
        strip.setPixelColor(22,nowColor);
        strip.setPixelColor(18,nowColor);
        break;

      case 3:
        strip.setPixelColor(21,nowColor);
        strip.setPixelColor(18,nowColor);
        break;

      case 4:
        strip.setPixelColor(20,nowColor);
        strip.setPixelColor(18,nowColor);
        break;

      case 5:
        strip.setPixelColor(19,nowColor);
        strip.setPixelColor(18,nowColor);
        break;
    }
  }

  switch(m%10){                                           // 일의 자리 단위의 분에 대한 색을 지정합니다.
    case 1:
      strip.setPixelColor(25,nowColor);
      break;

    case 2:
      strip.setPixelColor(26,nowColor);
      break;

    case 3:
      strip.setPixelColor(27,nowColor);
      break;

    case 4:
      strip.setPixelColor(28,nowColor);
      break;

    case 5:
      strip.setPixelColor(29,nowColor);
      break;

    case 6:
      strip.setPixelColor(34,nowColor);
      break;

    case 7:
      strip.setPixelColor(33,nowColor);
      break;

    case 8:
      strip.setPixelColor(32,nowColor);
      break;

    case 9:
      strip.setPixelColor(31,nowColor);
      break;

  }
}